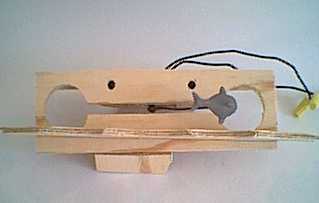
One thing I discovered is that if you add light to the animation from below the layout surface, the dark areas of the holes or
openings in the surface seem to disappear. A few 2.5 volt Christmas tree lights to balance the room lighting and eliminate any
shadows or darkness is all that it takes to promote the illusion of an uninterrupted surface, almost as if the dolphin was actually
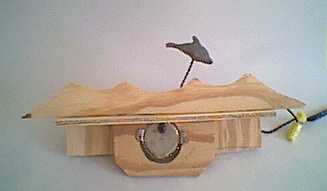
jumping up through and diving into painted water. There will be baffles below the surface, similar to wings on
a stage, where the blue color will be painted (about 3 inches below what is the current layout surface), so provided there is a
little added light to remove any shadow from beneath, the hole in the surface should be much less apparent, especially with the
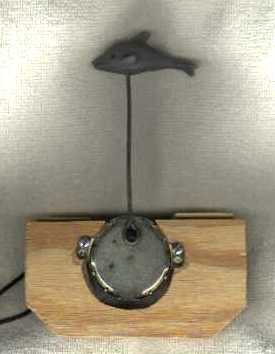
distraction and visual block of the waves and caulk "splashes." (Latex caulking was applied like cake frosting to imitate small wave peaks.) Also, lights placed behind the plywood wave will add a nice
lighting effect, similar to the footlights on the lion animation. These lighting effects may minimize or accentuate an object, like
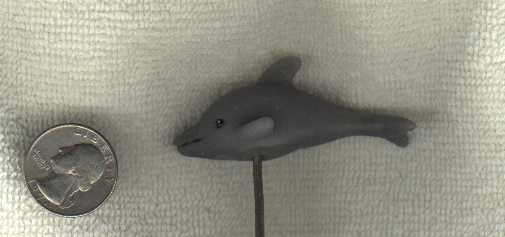
the wire that supports the dolphin. Obviously, any way to make the wire less apparent is desirable to enhance the illusion of a
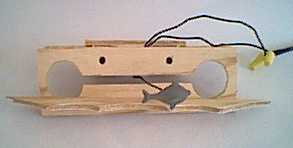
free-flying dolphin. So, experimentation is key to getting the right
lighting effect, sometimes just moving the light a fraction of an inch can make a huge difference. Fortunately, from the usual
viewing angle, the dolphin will be seen against the blue painted water, not the rock pier of the bridge behind. So, painting the
wire to match the background is the objective. If the project were to be viewed from all angles, then a compromise of sorts
would have to be reached as to what color the wire should be. A thinner wire would be better visually, but in this case no
movement or flexibility is best, hence the thicker, more visible wire. Just like most things in life, compromise and moderation are
keys to success.
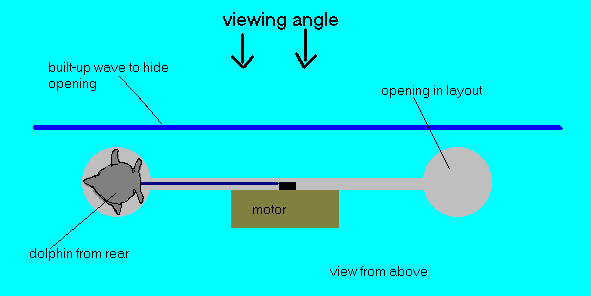
My intention was to have a layout that was viewed only from the front, however I have a 2 ft. wide isle along the back walls
and guests will often wall all around. So with this dolphin project, a second wave baffle would be nice on the back side to
maintain the illusion. Although it is sometimes like a magician reveling his secrets, it is nice for people to see how an effect was
achieved to promote creative thinking, so the reverse viewing angle will be left open.