From the topside, using a butter knife, gently pry off the control tower from the center section where the ride's arms are connected. (There should be a small gap where the tip of the knife can be inserted.)
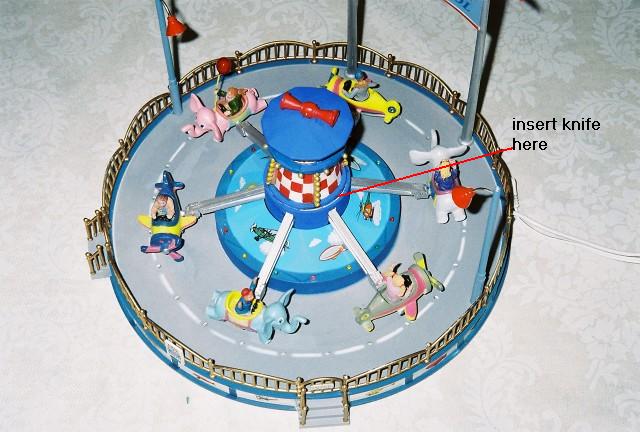
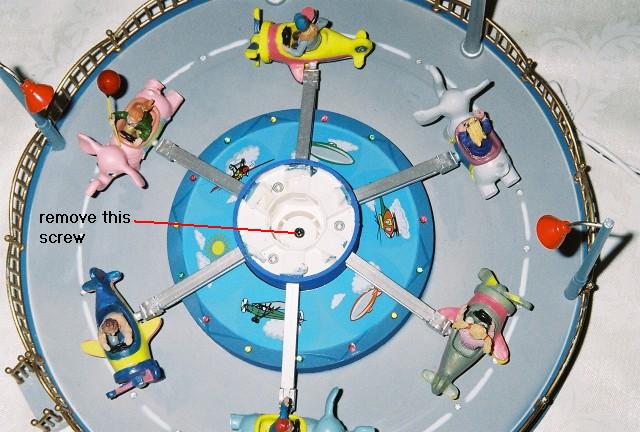
The glue releases rather easily, but it may be a little intimidating as you start to pry it up. With the control tower removed, one black Philips-head screw will be visible in the very center; the other three screws should be left in place. Pull the "assembly" (the assembly that the individual craft are attached to) straight up. Once this is done, the curvy disk will be dislodged, so you will have to open up the base to realign the disk. Don't attempt this repair if you don't have some successful experience with hobby repairs.
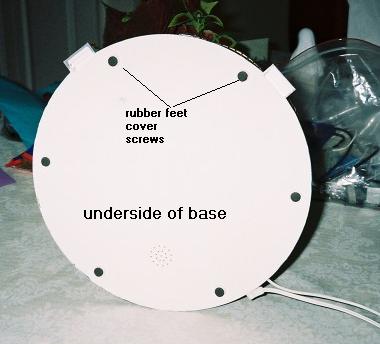
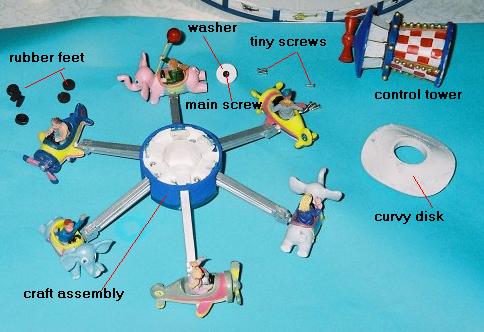
There will be a lubricant under the center geared section, so place the assembly on a piece of plastic and keep the lubricant from getting on your finger tips. The base may be lightly glued to the deck, so insert a tiny screw driver to pry it up, if necessary. Be careful with the wiring so as not to break a connection. The curvy disk piece will be lubed with a white grease, so be especially careful not to spread it on the belts and pulleys. These belts will be ruined if they become greasy. Set aside the disk and wash your hands and finger tips.
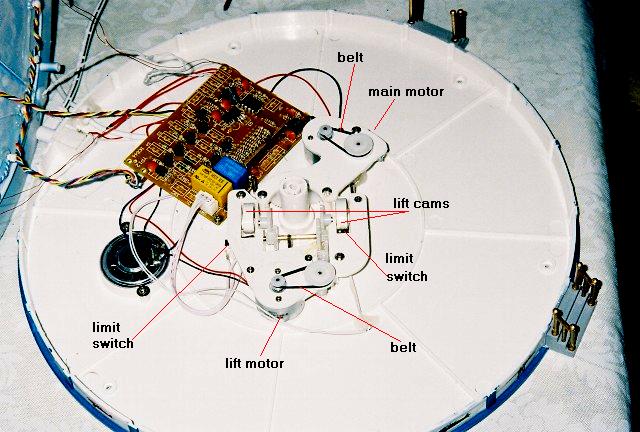
Notice the mechanism where there are 2 limit switches for the lift mechanism. The one motor controls the lifting and lowering, the other is for the continuous turning. Both motors are identical. The motor for the lift mechanism reverses direction by its polarity changing.
I suspect that the main problem with operation will be a loose or broken belt, or perhaps a belt has popped off of the pulley. Finding the correct replacement belts may not be easy, but those rubber band ties that are used for pony tails, sold mostly for young girls, which can also be used for a temporary traction tire on certain train wheels, may be a temporary fix. When you find the correct replacement belt, perhaps those offered for old tape decks, I would suggest buying several to keep on hand. Once you open up the ride, it isn't as scary a task as one might think. Having these photos should be a great help.
My intention was to recontrol the action, but after looking inside, I believe I will wait for a failure before attempting any change. One thing that might be advisable is to keep the curvy disk well lubricated with a plastic-compatible grease. Again, I suspect that the belts would be the main point of failure, so keeping them in good shape, free from the oil and lubricants, will yield many years of good performance.
For purposes of a train layout (Christmas Garden), splicing into the wiring may help customize the action. The biggest issue would be with the lift mechanism where the limit switches would have to work reliably to prevent the mechanism from jamming. Since the lifting and lowering action is very impressive, I would like to be able to control this cycle often and automatically if possible. Again, I suspect that the belt would be the main maintenance issue here. I would use a separate power supply to control the motors, and a DPDT switch, and redirect the limit switch wiring for the lift motor. The chasing lights (and the sounds for those who like them) would be left to run continuously. When a wiring change is made, I will share it here. It would be similar to way I control my homemade elevator for the mine area.
When reassembling the base, be sure to replace the curvy disk on the three metal posts.
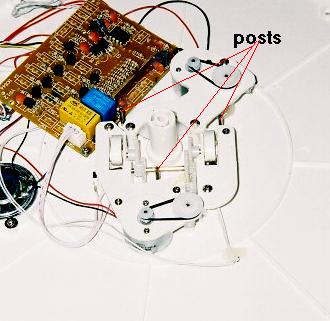
It only fits on correctly in one position, with the 2 sets of "bars" underneath aligning over the lift cams. Again, be careful not to get any lubricant on the pulleys or belts. Use only a couple drops of common white glue to re-secure the control tower so it can be easily removed for future repairs.

Since I don't frequent garage sales, I don't know how often broken animated Lemax items turn up, but I suspect that simple repairs, like replacing belts, is all that it takes to fix them. Perhaps the biggest challenge is in figuring out how to open up a ride to access the mechanism. Perhaps buying a broken item at a sale would be good for spare parts. Something like the Junior Flight School animation would be a favorite for many years, especially if it is kept in good shape.
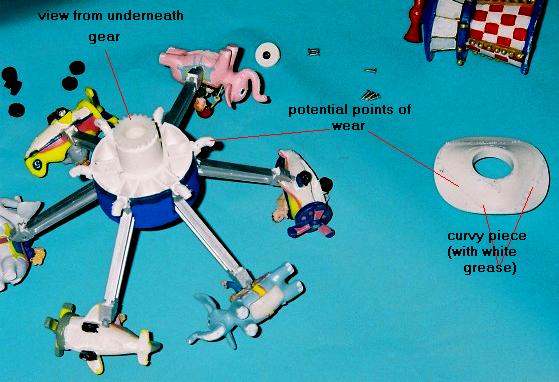
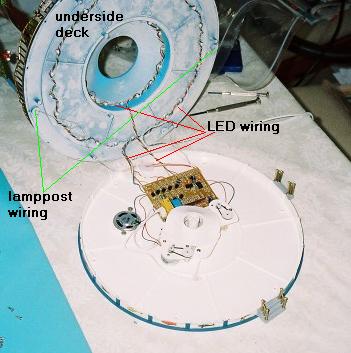
I suspect that eventually the curvy disk and contact points of the "arms" would wear out, but the individual arms could be glued into various fixed positions and the revolving motion can be achieved by any low rpm motor, driven directly. The LEDs could be replaced, and the chasing effect or sound effects wouldn't be necessary. The LED wiring is very well done and quite extensive. Those who know electronics could probably troubleshoot an electrical problem with ease. So this item can survive for many years. Its beauty is in the sculpting of the figures, planes, and elephants. A simplified version of this animation would be almost as effective.