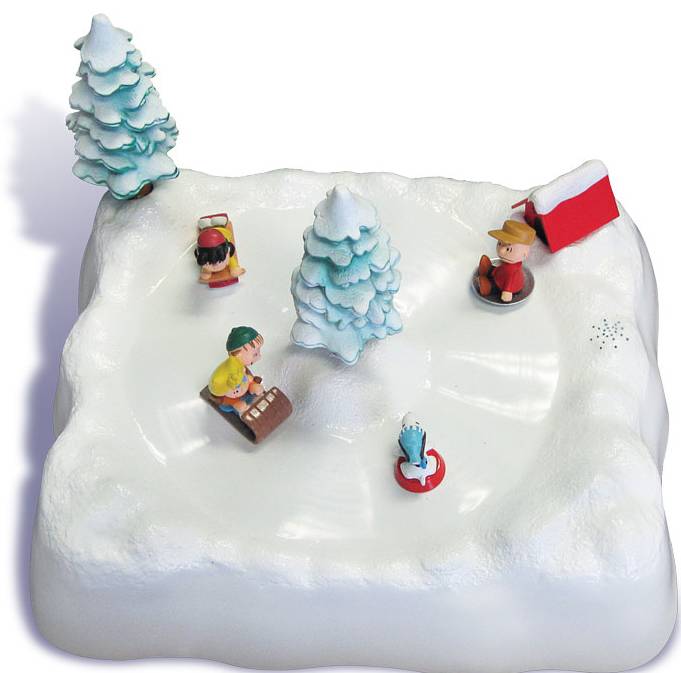
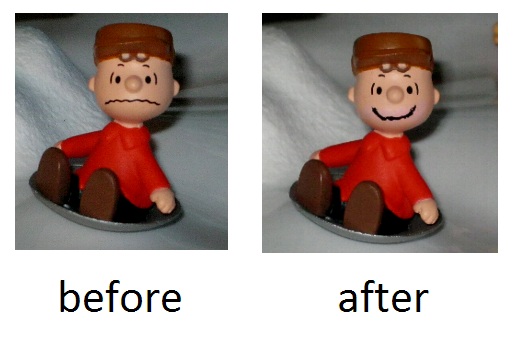
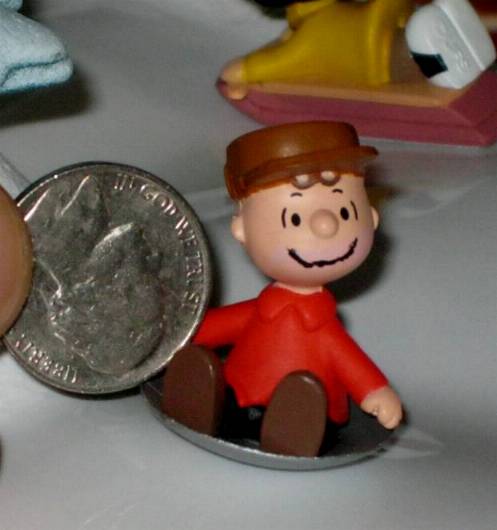
The Charlie Brown Christmas Toboggan Run animated item by Forever Fun was manufactured in 2008. I became aware of this item from a YouTube video a year or so after it was first introduced and it was no longer available except for sale on the secondary market. Fortunately a few older items recently (summer of 2011) became available from Time and Space Toys, and I bought them not only at a good price, but also with free shipping. This item is particularly suited for Toy Train hobbyists because it works with approximately O scale layouts and appears visually compatible with other O scale buildings and figures, although it is hard to determine the precise scale of the figures because they are cartoon characters. (It also could be used on some HO layouts with a little visual trickery.) Now I mix the larger approximately G scale Peanuts figures with the Lionel O gauge trains, but they may seem out of place for many hobbyists who criticize Lionel's non-scale offerings, like the cartoon characters on the handcars, or the automated gateman and newsstand accessories. This toboggan run animation would look nice next to many of the department 56 type ceramic and porcelain buildings, or even Plasticville. It also would work visually with any of the Lemax animations. Forever Fun also offered an animated skating rink with the Peanuts characters. I really liked the action here and the way the figures don't have any unnecessary bases in order for them to glide on the white plastic surface of the snow. I was particularly taken with Linus and Sally on the toboggan together. But I disliked Charlie Brown's frown, so I changed it with a few swipes of acrylic paint while wearing magnifying glasses. Light pink and tan acrylic paint, mixed in the appropriate proportions, lightened with a dab of white if necessary, will allow you to achieve a good match to Charlie Brown's skin color. A little trial and error testing is all it takes to get a good mix. The acrylic paint will wipe off the figure's surface with a wet q-tip before it dries, so it is easy to try different paint mixes until the correct color is achieved. It is only necessary to paint out the old mouth. When repainting the mouth, be sure the black paint is very thin and use a very fine brush of only a few hairs to get the thinnest line. Practice the mouth paining on a wooden bead. The line can be wavy, so don't aim for total perfection, just a broad smile if you want to change it. If not, it can stay as it was manufactured. But he looks so much happier with that smile. Who wants to see Charlie Brown looking so sad?
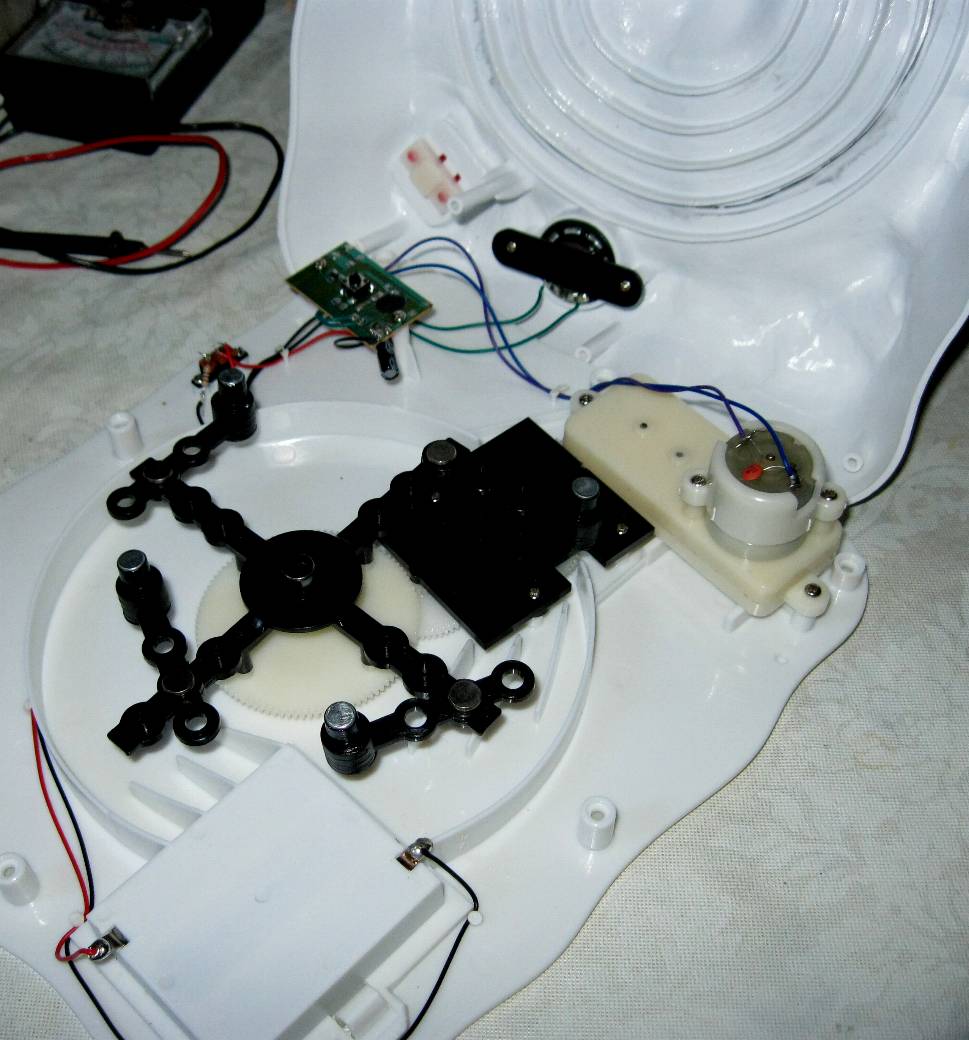

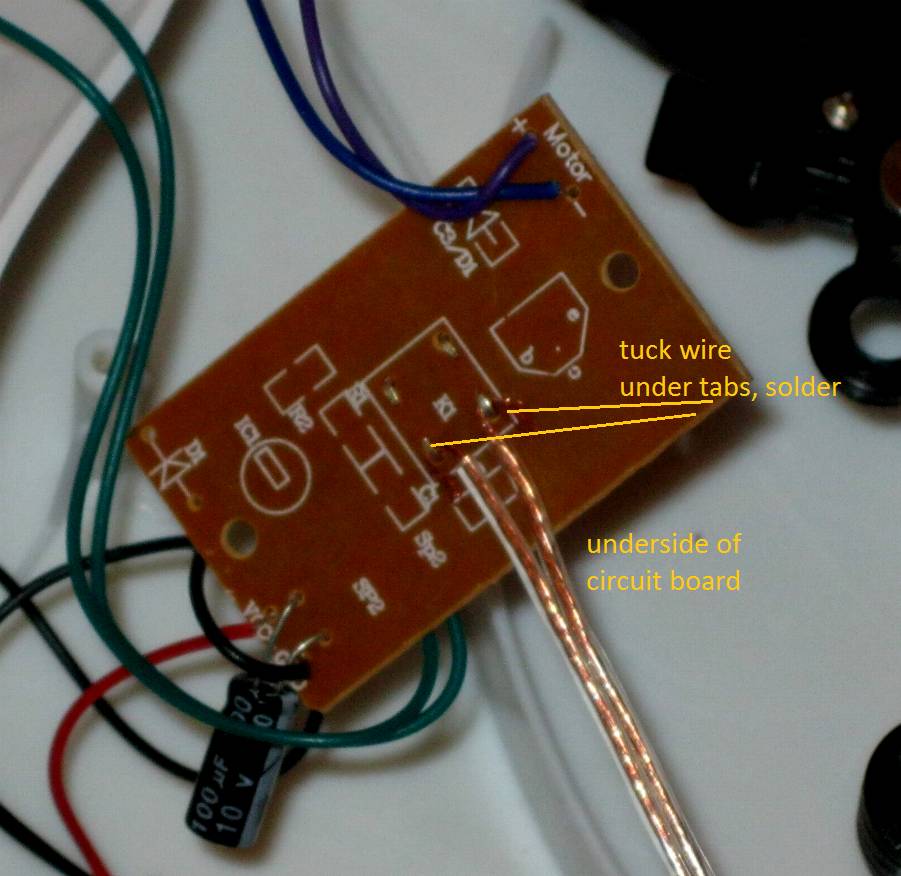
One drawback of this animation is that it only operates for 30 seconds after the doghouse is depressed. There isn't a volume control however if the doghouse button is depressed rapidly in 2 quick successive presses, the sound will not play, but the motor will run for 30 seconds. So an easy hack of the mechanism is to run a "jumper" from the negative motor terminal which has a blue wire, not purple, soldered to it (marked A in the photo), and then to the negative tab of the battery compartment that has a black wire soldered to it (marked B), with an optional switch in between. This modification will allow just the motor to run continuously (without sound unless the doghouse is depressed) when the original "on/off" switch is in the "on" position and the new switch is also in the "on" position. If using an AC adaptor,
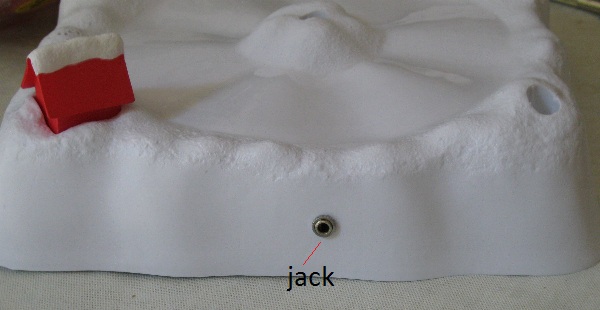
Some method of limiting the continuous running of the motor is desirable because it isn't known if the motor is rated for continuous duty. I didn't notice any marking or numbers on the motor that identify it in any way. I did notice that the circuitry does take the approximately 3.5 VDC, so a 3 VDC wall transformer is just fine to power the ride although theoretically the circuit gets 4.5 VDC from the 3 batteries in series. The best choice would be to provide intermittent operation of about 5 minutes running and 3 minutes not operating to preserve the life of the motor and the mechanism. Another choice would be a "dead man" style switch where the viewer would need to hold down a button in order for it to operate.
This item is easily displayed with the typical polyester batting snow blanket that is readily available at Christmas and yearlong as a quilting and sewing product. And the ride being surface-mountable, no need to recess it into a tabletop; the snow blanket can be brought right up to the sides as snow drifts. Polyester batting is a best-friend for the seasonal toy train hobbyists with its easy and forgiving properties as a fast surface covering and for creating undulating terrain. And interesting lighting effects are achieved by just placing standard Christmas tree lights under the batting. But perhaps the most significant thing is that this animation is very affordable, coming in at less than half the price of many Lemax and Lionel animations. A perfect choice for a quick Christmas layout or small set-up with an oval of O gauge (or even HO gauge) track, and a shorter train. It's battery powered, too. I altered the electronics for continuous operation without music, but it is ready to use with or without trains and village accessories. It is certainly a good choice for those downsizing their layouts and living spaces. Forever Fun offers other similar animations from time to time, and I look forward to many new and inventive things from them.
One often overlooked advantage of the Bachmann Plasticville buildings is that they are easily disassembled and stored in a small box, unlike the sometimes fragile ceramic and porcelain buildings that consume a good bit of storage space because they do not disassemble and have large styrofoam box inserts to prevent breakage. (I glue my Plasticville together and detail the windows, but they can be nested together for easy storage or other layout items can be packed away inside them. I used to store an entire under-the-tree layout with buildings and scenic elements, including the train and sectional track, in a couple of shoeboxes.) Thinking forward to more affordable, smaller and accessible layouts, this type of item which stores in a compact space when the trees are removed, could be the main focus of a small display other than the train. However, just a village setting without a train is quite enough for many hobbyists. Several Plasticville buildings can fit in an average-sized shoebox when disassembled. Some of the classic Plasticville buildings almost resemble those from Charlie Brown's neighborhood and could be made to look like dead-ringers with a little imagination and kitbashing. And this whimsical animation can be set out on a traditional Lionel toy train layout only for Christmas since it doesn't need any type of permanent installation and can just sit on the surface. Even if this particular item or theme is not your cup of tea, the concept of an animated item teamed up with some buildings, and perhaps a train, can make a nice display, small or large, at Christmas and/or year-round.
Just the perfect choice for an O scale layout or village. A dusting of talcum powder on the base's surface will help the figures glide more easily if they tend to move in a jerky manner. The action is not just circular, but the figures ride up and down the little "bunny" hills, sometimes spinning a little too!
Please refer to hobby reference materials for correct and safe use information
regarding these and all electronic circuits. These diagrams are intended to explain how things were accomplished in theory, but it is the
responsibility of the individual to locate precise information regarding electrical circuits, materials, ratings of components, etc. Do not attempt
these hobby projects, or any electrical project, if you don't have the necessary skills and experience.
The site owner is not and cannot be held liable for fire, electrical shock, property damage, bodily injury, loss of life, or accident of any kind caused by electrical circuits or any ideas, projects, techniques, or information contained on this site.
The visitor assumes all risk and responsibility for any loss, injury, accident or damage arising from the use of information, ideas, techniques, projects, concepts, components, products, and circuits on this site.